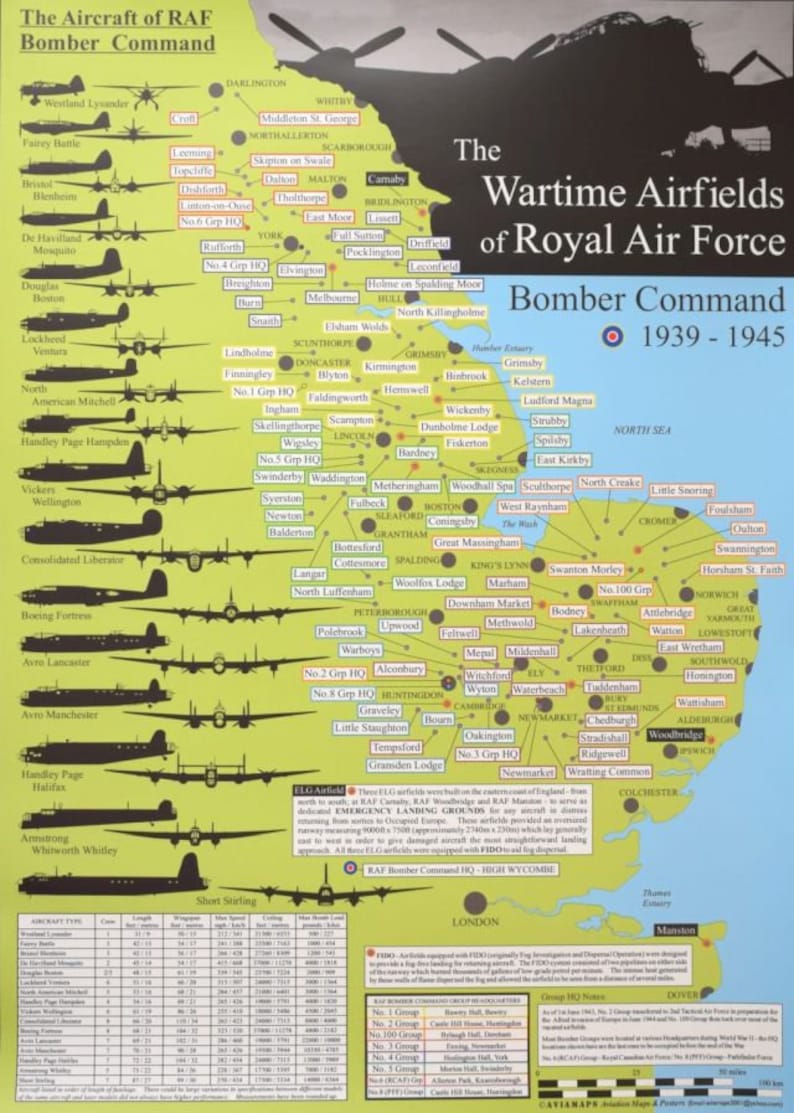
During the Battle of Britain, the defence of the UK's airspace was divided up within RAF Fighter Command into four Groups, each comprising several airfields and squadrons.
The groups involved, 10, 11, 12 and 13, saw very different levels of activity during the battle. No. 11 Group, responsible for the defence of London and the south-east saw the heaviest fighting, and pilots were often rotated among the groups to allow them to rest and recuperate after several weeks of fierce contact with the enemy. Each group was commanded by an Air Vice-Marshal, who served under the head of Fighter Command during the battle, Air Chief Marshal Hugh Dowding.
Organisational structure
Key:
- HQ = Group headquarters
- SS = Sector station
- SA = Satellite aerodrome
10 Group
10 Group defended Wales and the West Country and was commanded by Air Vice-Marshal Sir Quintin Brand.
11 Group
11 Group covered the southeast of England and the critical approaches to London and was commanded by Air Vice-Marshal Keith Park.
12 Group
12 Group defended the Midlands and East Anglia and was led by Air Vice-Marshal Trafford Leigh-Mallory.
13 Group
13 Group covered the north of England, Scotland and Northern Ireland and was commanded by Air Vice-Marshal Richard Saul.
See also
- List of Battle of Britain squadrons
- List of former Royal Air Force stations
- List of Royal Air Force stations
- Luftwaffe order of battle August 1940
- RAF Fighter Command order of battle 1940
Notes
References
External links
- Interactive map of operational airfields with squadrons and aircraft type displayed
- Article about the Battle of Britain from North Weald Airfield History